Introduction
Introduced in v1.1, the Solid controller brings new options to the table and more dynamic behaviours. The controller used in the TinyCars and Aphex demo scenes is still supported and can still be used. Learn more about it on this page.
New solid vehicle
There are two main ways you can create a new vehicle. You can either duplicate an existing prefab and apply the changes you want, or start from a new mesh and follow these instructions.
Careful, it’s much easier to duplicate an existing prefab than create one from scratch.
TL;DR
If you don’t want to read the whole page (yet you should), here are simple steps to setup a Solid vehicle :
- fresh install of HR v1.3 on 2019.4.36f1LTS
- open the Playground demo scene
- remove the OffRoadCar prefab from the scene, add a Hannah prefab, position it at -230,1.5,115, unpack the prefab completely
- create a new cube, remove its collider, name it NewBody, nest it under the Hannah node, set its scale to 2,2,6, position it at 0,0,0, remove the Body node
- create a sphere, remove its collider, name it NewWheel, nest it under the FrontLeftSuspension/WheelPosition, position:0, scale:2, delete the Wheel node
- select the FrontLeftSuspension, drag the NewWheel into its WheelModel slot
- press play (optionally repeat for all 3 other wheels)
Mesh creation
Open a track scene (useful for scale, but you can also do that in a blank one), create a new empty gameobject in the scene and nest the new mesh into it.
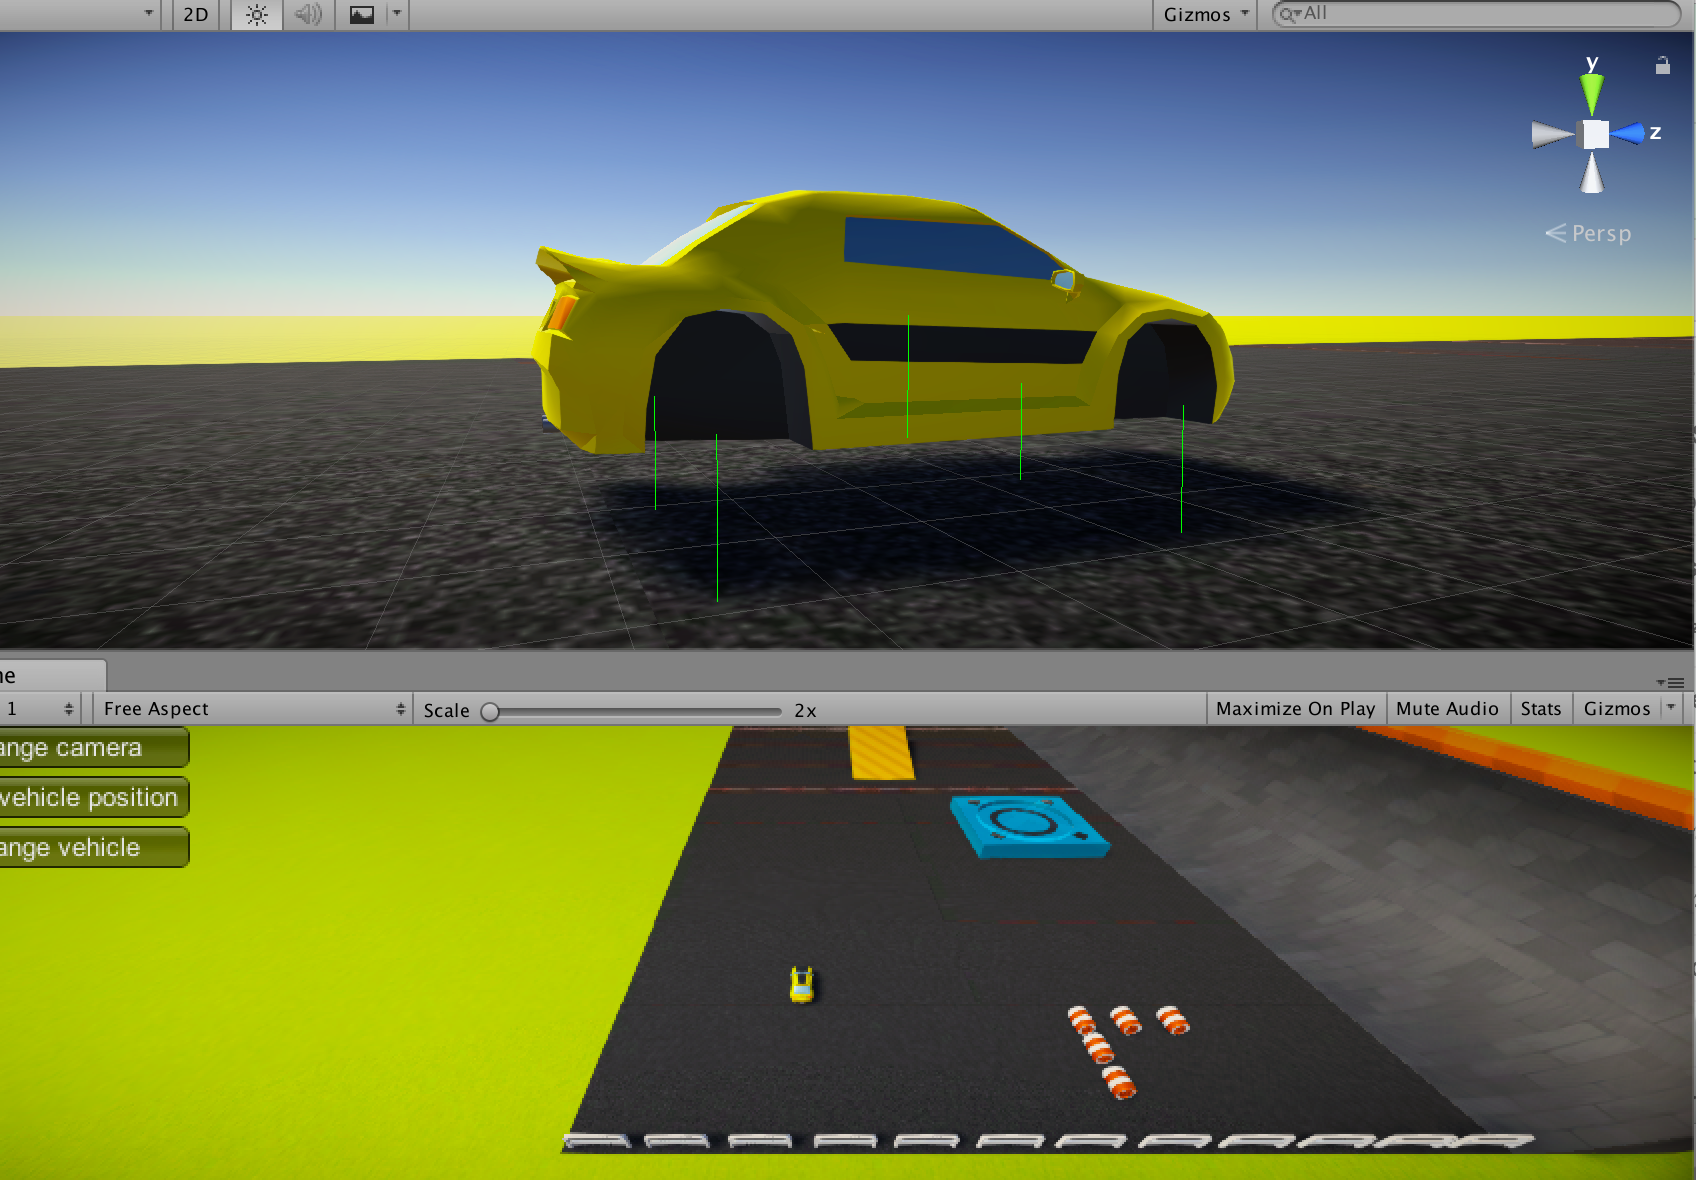
For this example, we’ll create our new vehicle into the “Playground” scene and import the Hannah model (in /Demos/Solid/Models/Hannah folder). You can keep another vehicle prefab like the OffRoadCar in the scene to compare sizes.
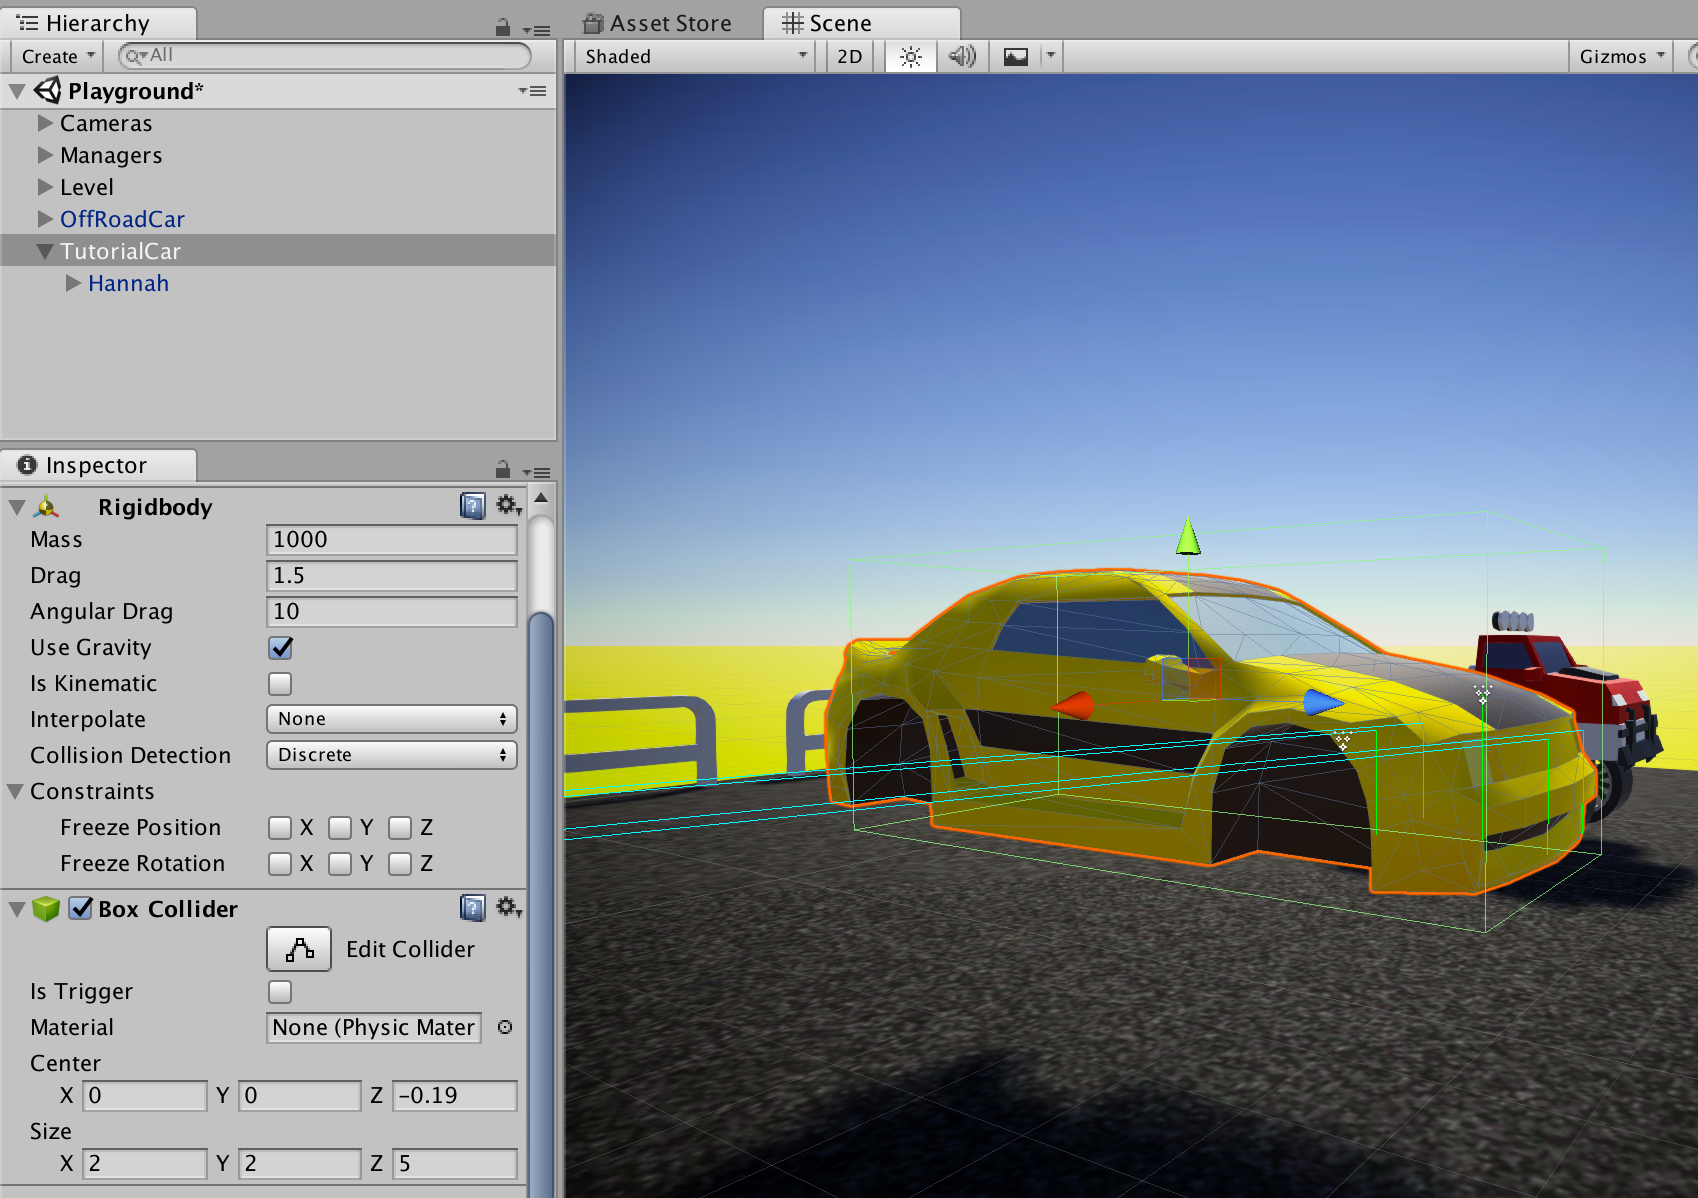
Name your top object TutorialCar, then modify the top object’s layer to Actors. Now you’ll need to add a rigidbody and a collider to it, as the gameplay is based on physics. Make sure the BoxCollider’s volume matches the mesh’s volume. The Rigidbody’s values must be realistic. You can take a clue from the values in the screenshot below.
Rigidbody:
- Mass: 1000
- Drag: 1.5
- Angular Drag: 10
BoxCollider
- Center: 0,0, -0.19
- Size: 2, 2, 5
You can now start the scene to check if gravity is correctly applied to your vehicle.
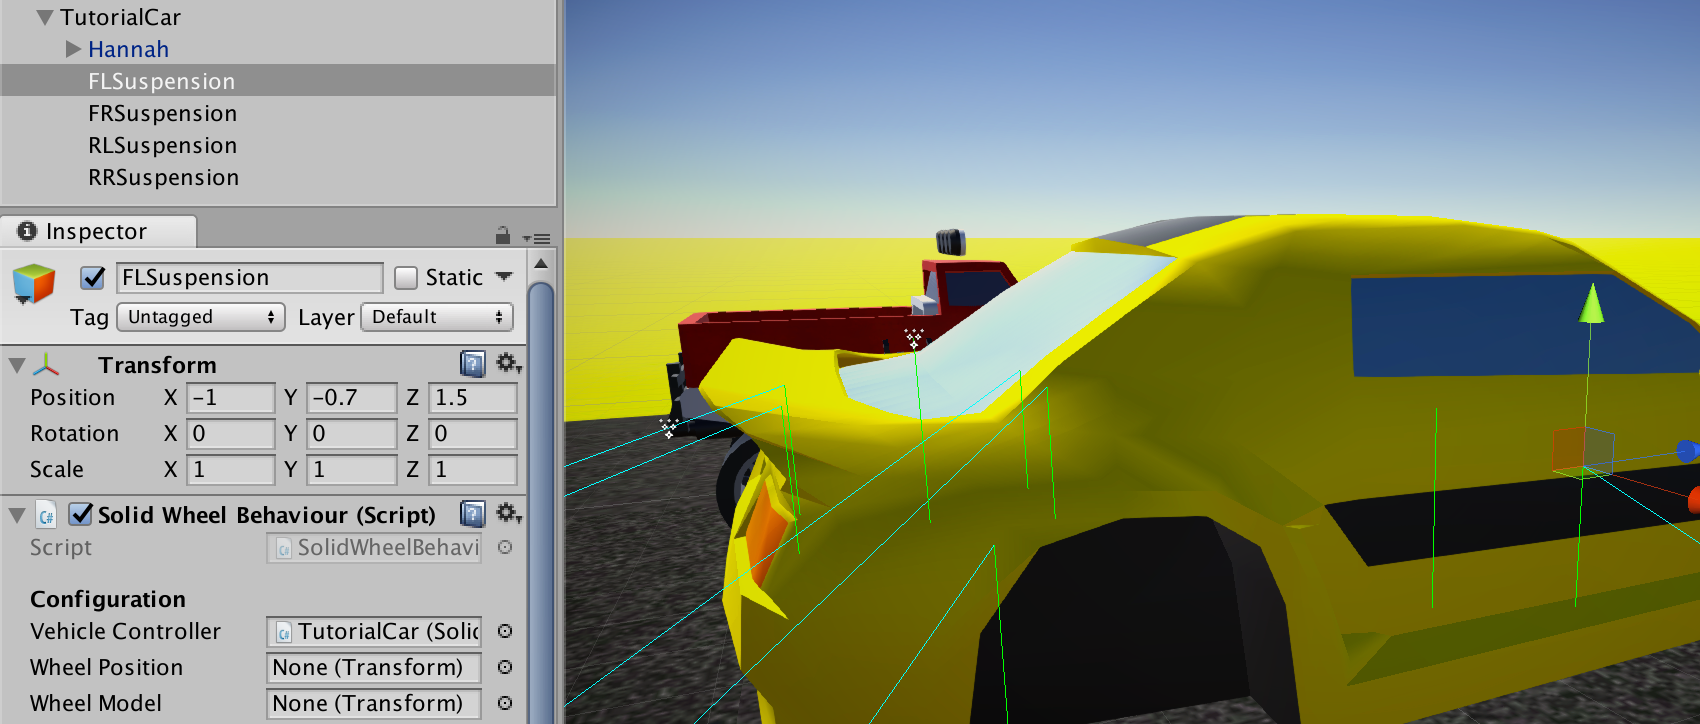
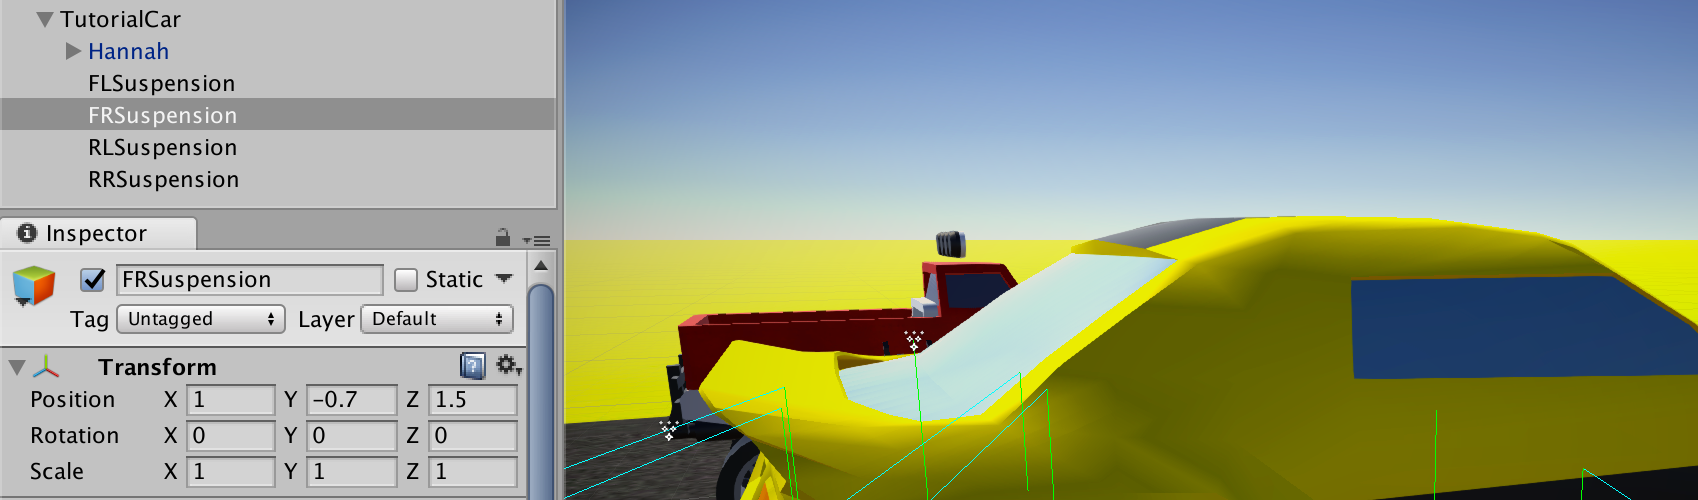
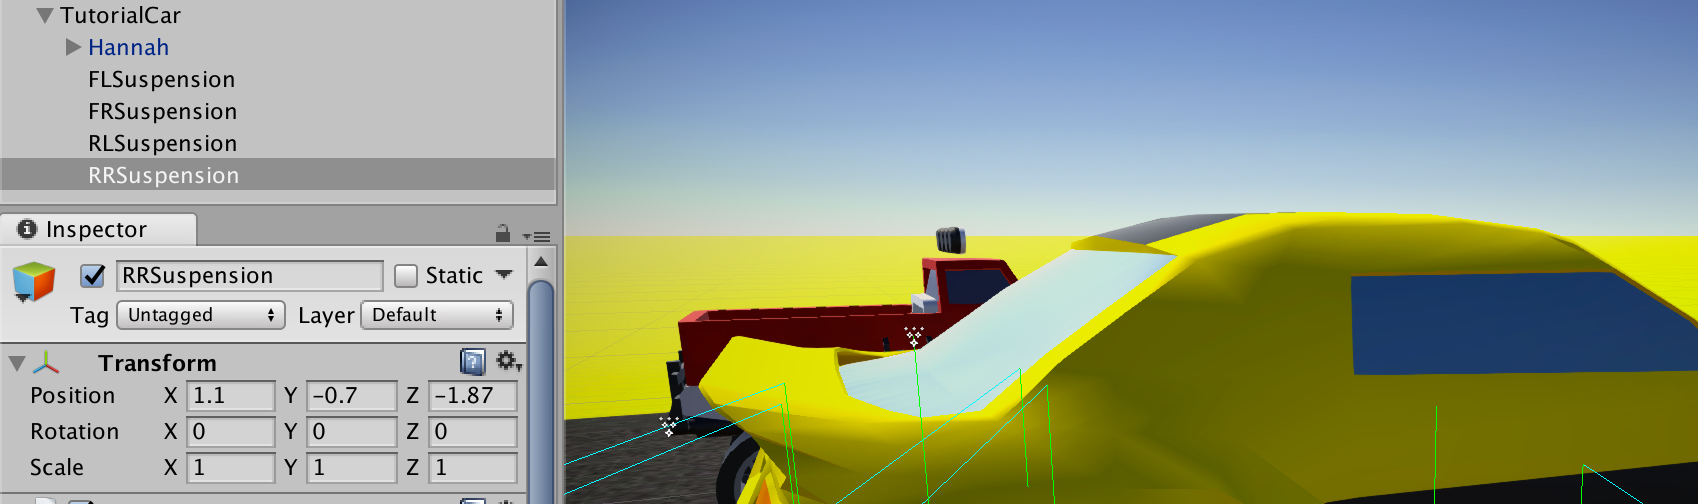
Adding suspension
The first thing to do is to add the SolidController component to your GameObject, to get default values for the Suspension System inspector.
Then, add 4 empty game objects, nested under the TutorialCar level. They’ll represent the suspensions :
- FLSuspension (Front Left)
- FRSuspension (Front Right)
- RLSuspension (Rear Left)
- RRSuspension (Rear Right)
On each of these objects, let’s add the SolidWheelBehaviour component, then bind the TutorialCar into their VehicleController field.
The position of the suspensions will determine how the vehicle behaves relative to the ground, so try to balance the vehicle by placing the suspensions in each corner of the vehicle’s model. You’ll usually also need to place them a little lower than the model so that the suspensions touch the ground before the BoxCollider.
You can take a clue from the values below :

When starting the scene, your vehicle should now be standing, without wheels (the wheels are really just a visual thing, they don’t impact physics).
You can also try to move the vehicle in the scene view, it should recover to its original position (well unless you turn it upside down).
Adding Controls
To drive your vehicle around, you need to finish setting up the SolidController component’s inspector. The two animation curves (Torque Curve and Backward Force Curve) probably need some tweaking. Select the Torque Curve, and affect the first AnimationCurve available in the solid_curves library, as explained below :
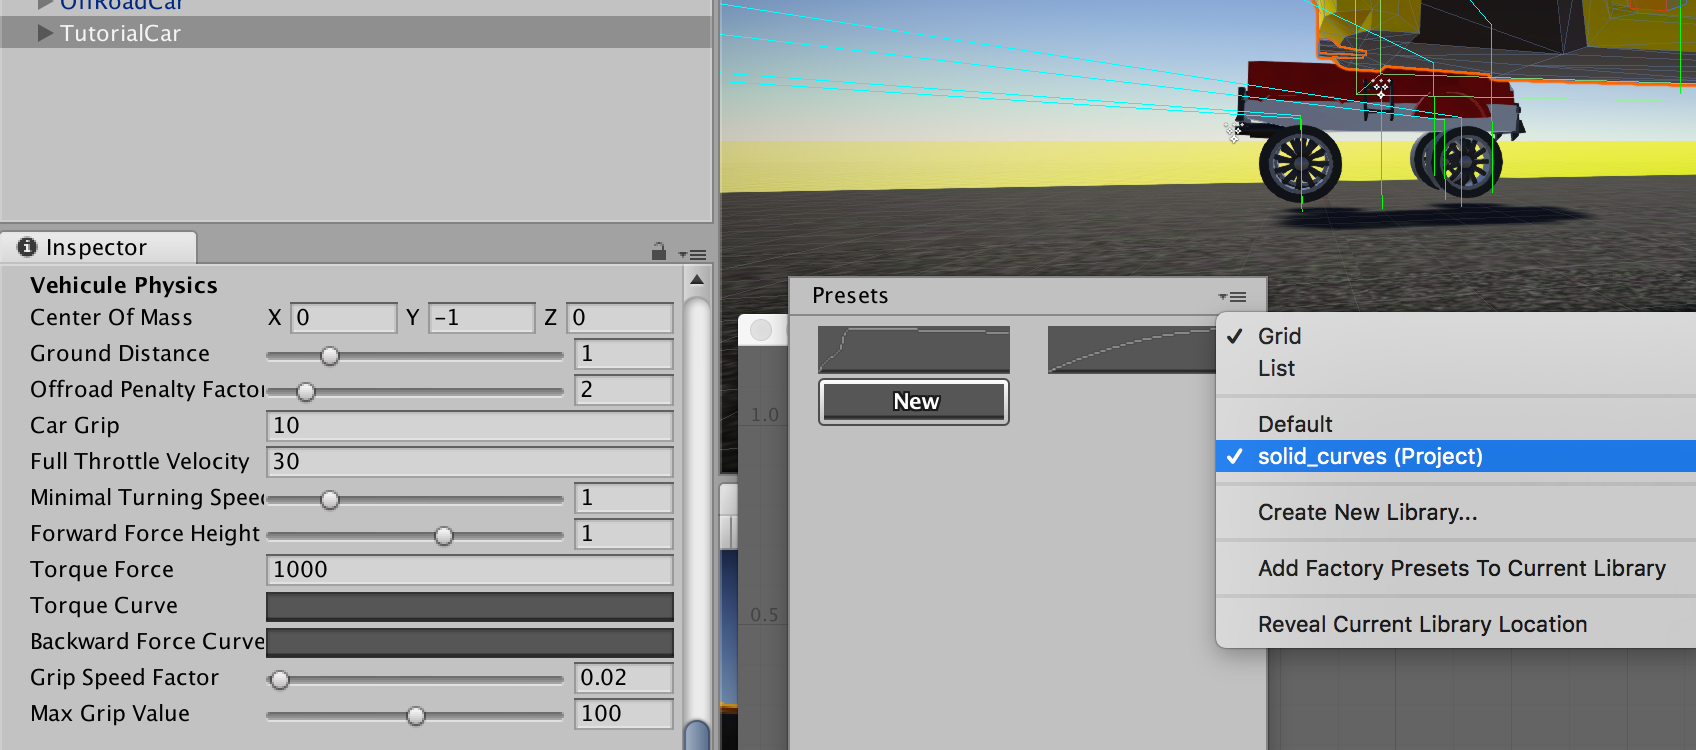
Then, do the same with the “Backward Force Curve” and the second curve in that library.
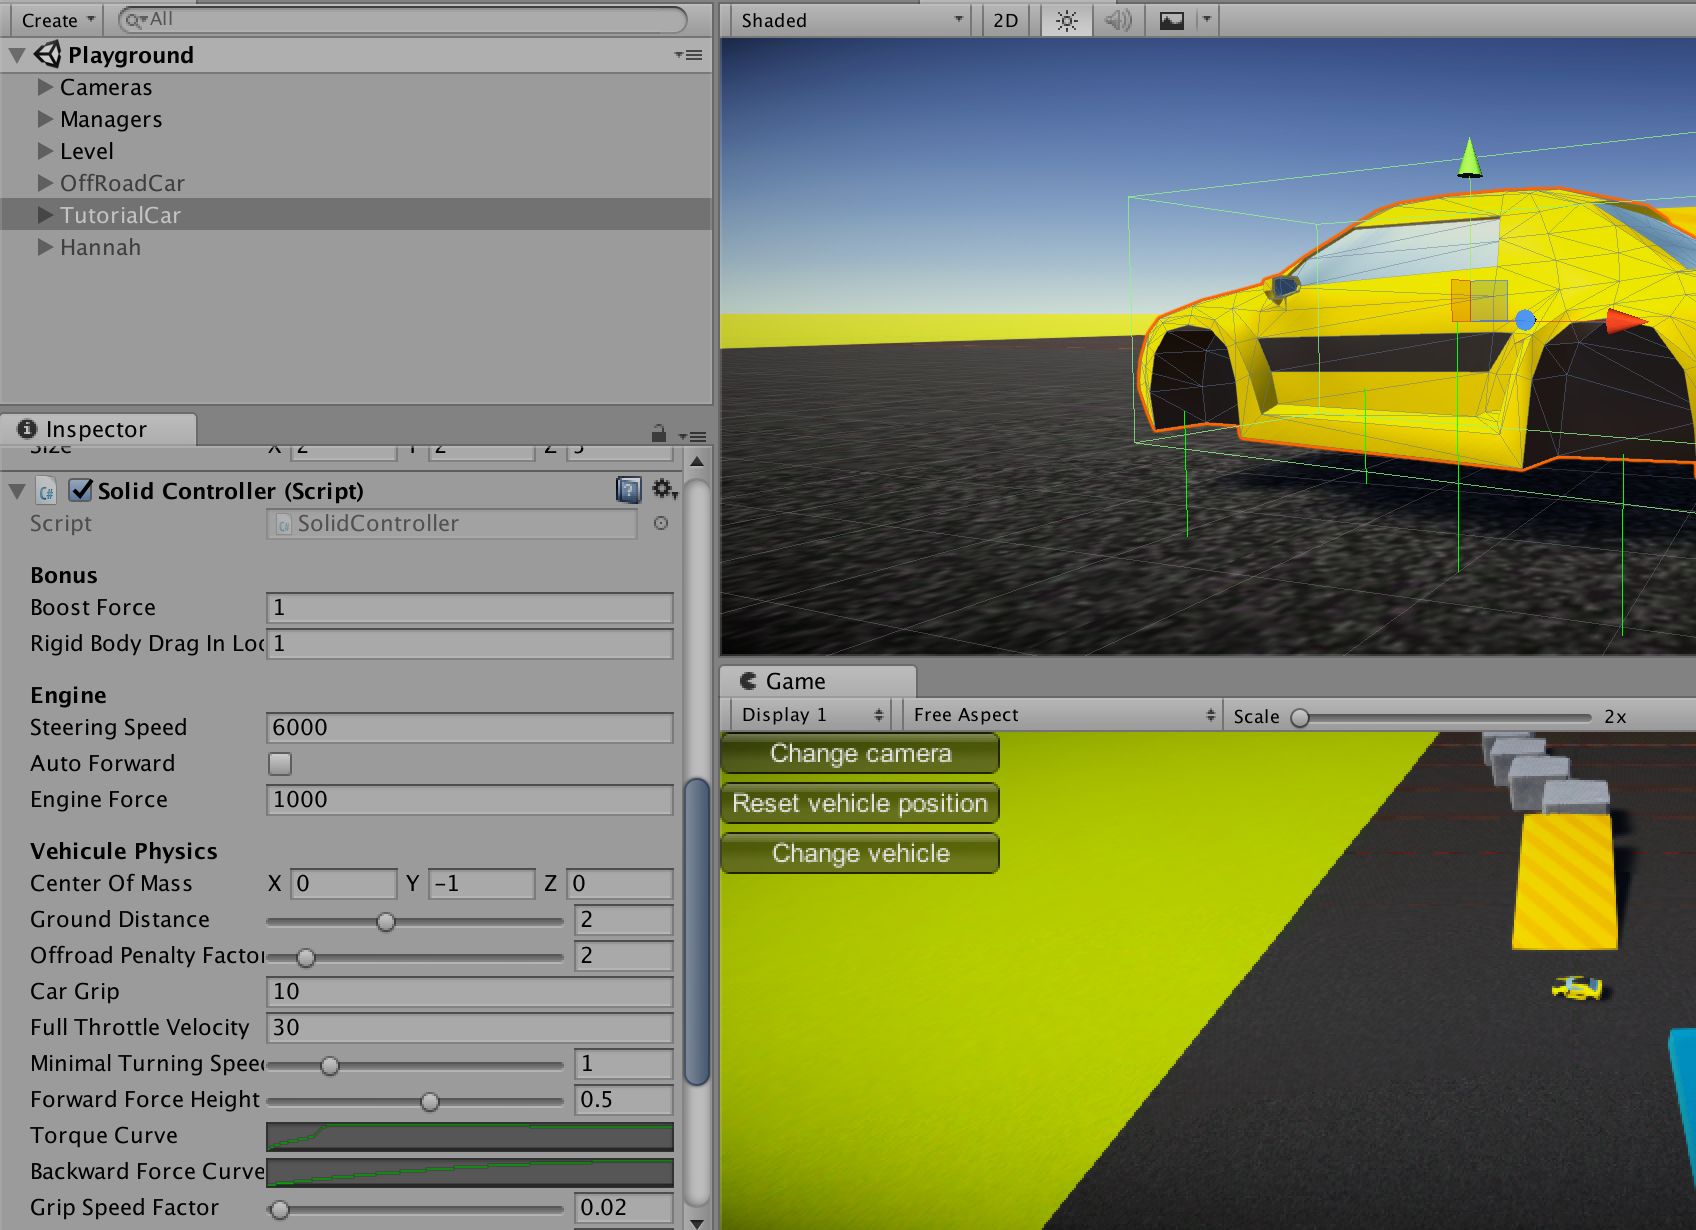
Then, configure the TutorialCar’s values as follow :
- Steering Speed: 6000
- Ground Distance: 2
- Forward Force Height: 0.5
The rest can be left to its default value. You should now have something similar to this :
By starting the scene now, you should be able to drive your vehicle around, take jumps, etc.
Adding the wheels
As explained above, the wheels are purely cosmetical, and won’t impact physics.
Under each suspension, add a new WheelPosition gameobject. Under this WheelPosition, add the wheel model you want to display. You can take the one in Demos/Solid/Models/Wheel for example.
When positioning the wheel and the WheelPosition object, each object must have a position of 0,0,0. Then, for each wheel model, you can change the Y rotation to tweak its positioning.
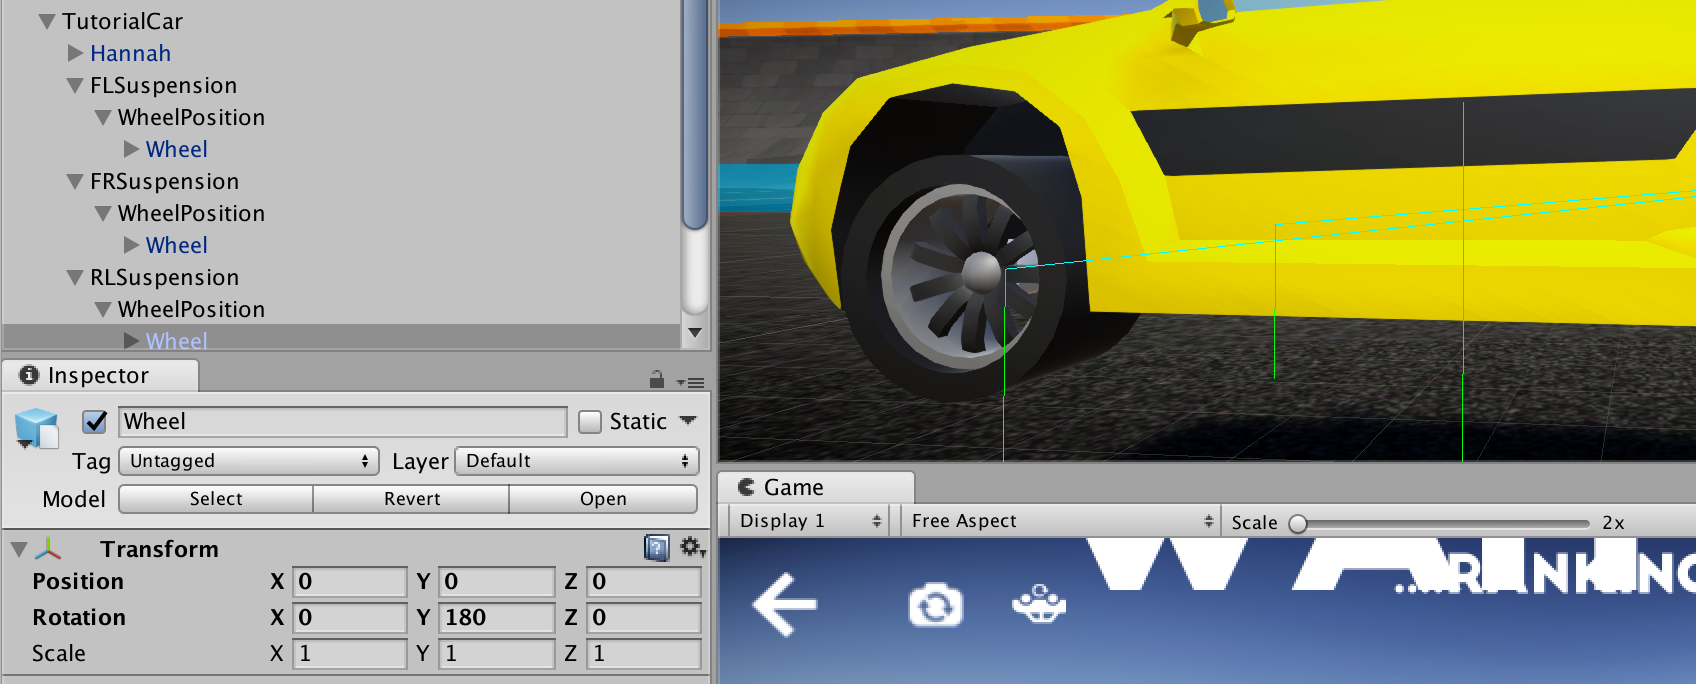
For the wheels to behave correctly, you just have to bind the SolidWheelBehaviour to its two children (Wheel Position and Wheel Model), as shown below :

Finally, setup each SolidWheelBehaviour :
- Rolling Orientation: Normal or Inverse depending on which way you’d like your wheel to rotate
- Steering Wheel: depending on whether or not you want the wheels to turn when steering
Adding effects
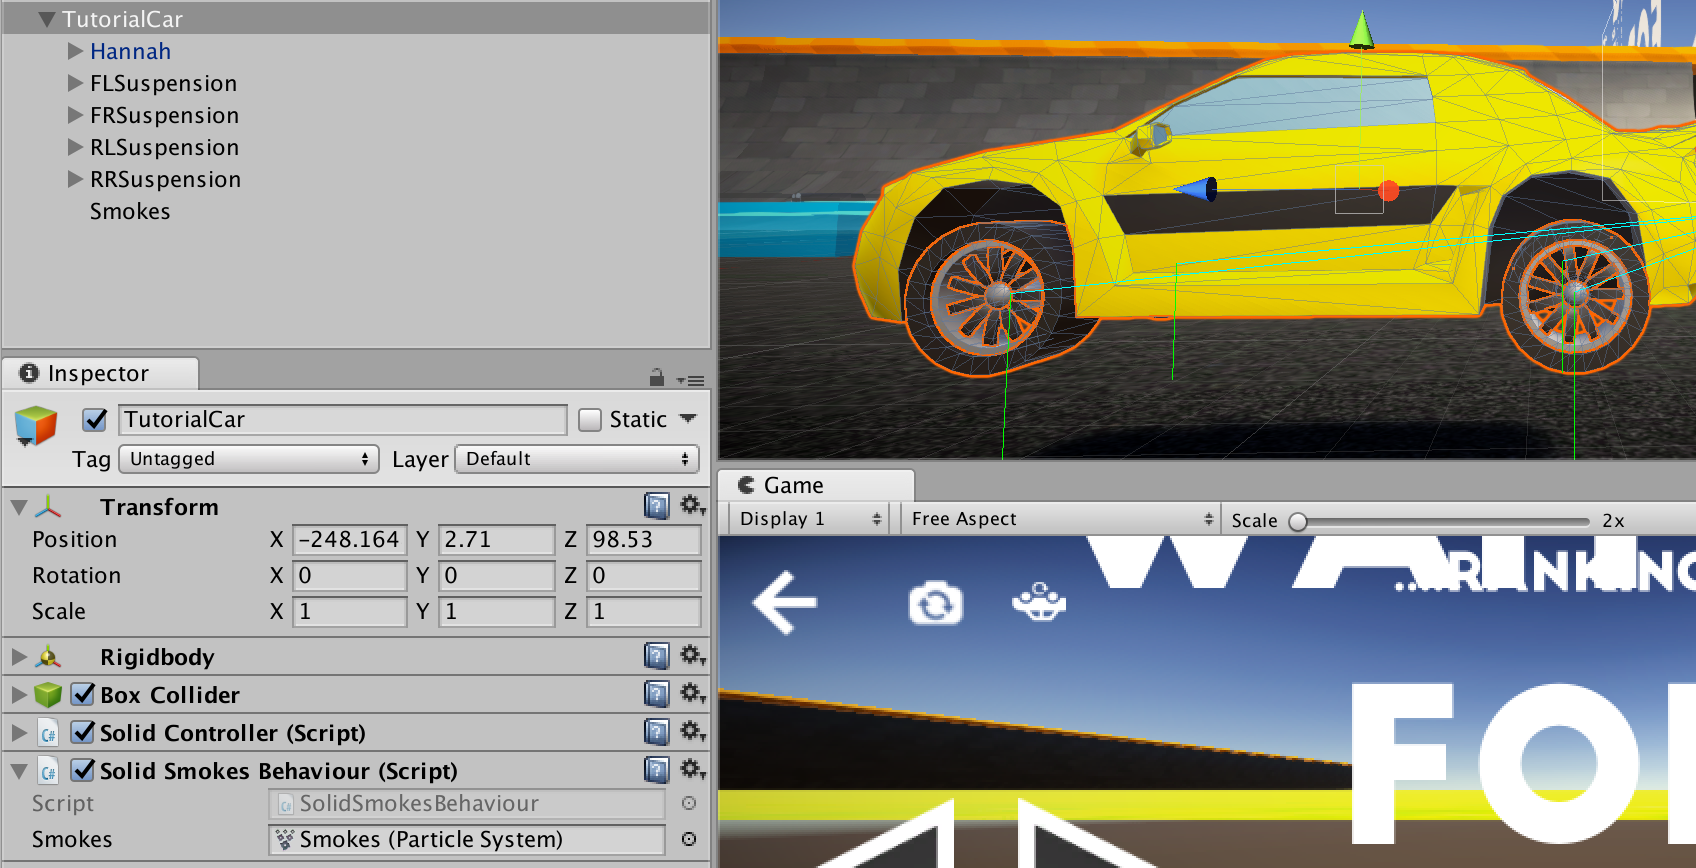
Effects (skidmarks, smoke…) are added as components on the SolidController when it’s a global behaviour, such as smoke, or on the SolidWheelBehaviour when it’s a behaviour specific to each wheel, such as the skidmarks.
For example, to add a smoke effect, duplicate the Smokes gameobject present on another vehicle, and add the SolidSmokesBehaviour component to the TutorialCar object, and bind the Smokes object you just duplicated to it.
Going further
To add AI, lobby and network compatibility to this vehicle, you can just refer to the Create new vehicle documentation, which is common to all Highroad Engine controllers.