Creating a new track
You can either simply duplicate an existing track and rearrange elements, or you can create your own unique track (it’s not that hard).
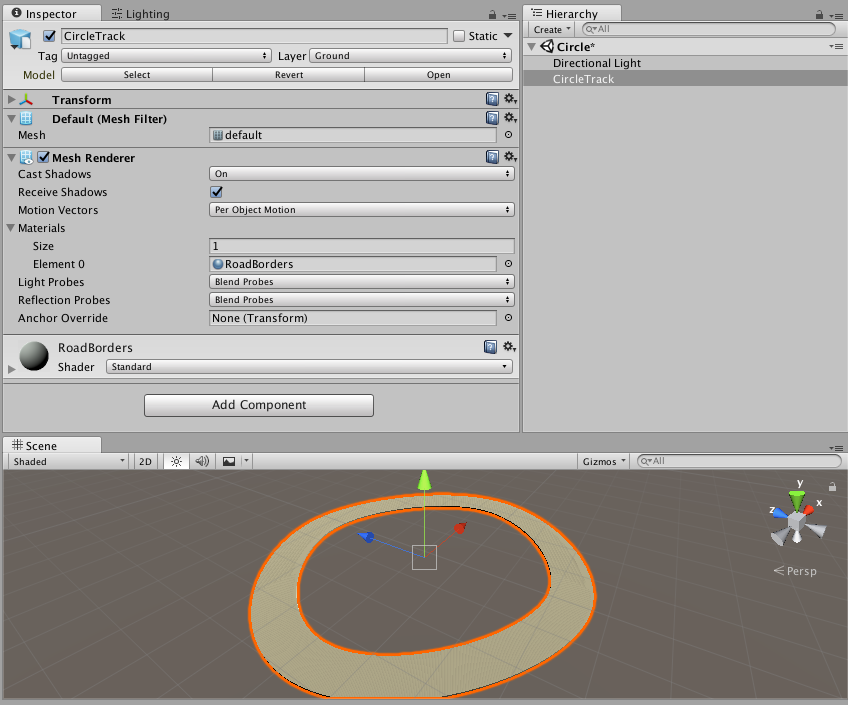
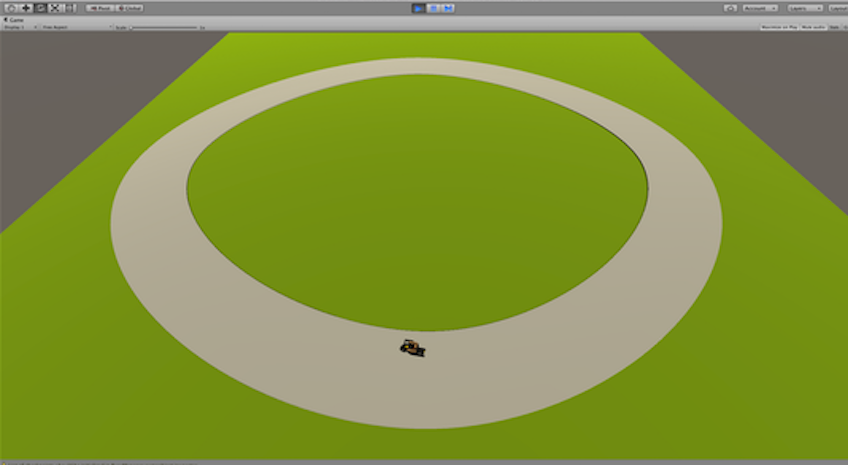
Let’s create a new track for our bikers, starting with a round track mesh. The name of the scene will be Circle, and we start with a very simple mesh.
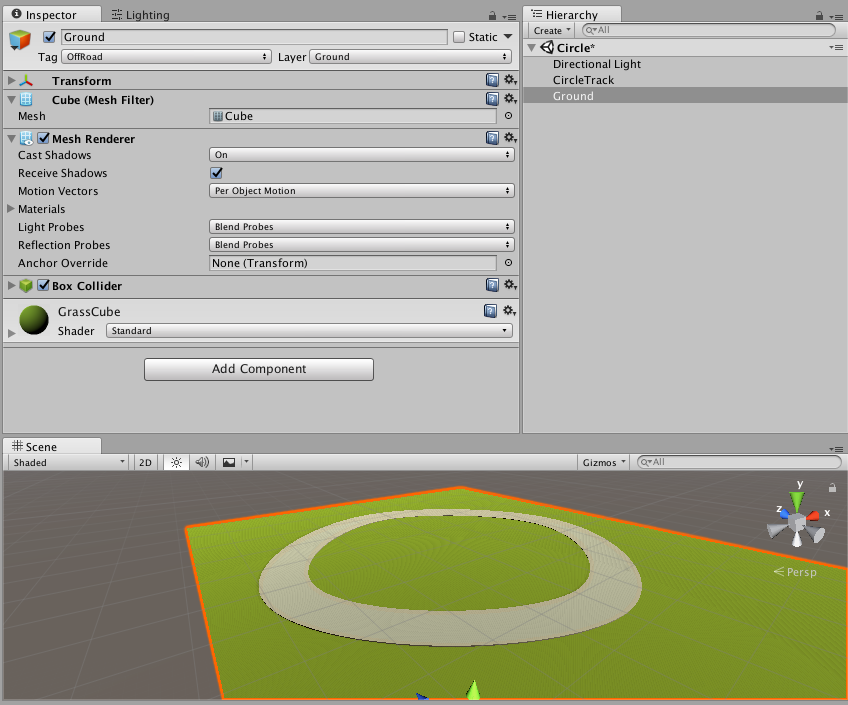
Let’s add a grassy ground around our track. To do so, a simple cube should be enough. It needs a box collider, and must be on the Ground layer (via the top right dropdown in the inspector). If you want that ground to apply a speed penalty to vehicles going over it, you can also tag it with the “Offroad” tag. To refine the ground’s behavior, you can also add a “grass” physicsMaterial, provided in the asset.
Then, position your track at the right place on the ground. Set its layer to Ground. To finish setting up the track, add a Mesh collider to it, and specify a physics material (for example the RoadPhysicsMaterial).
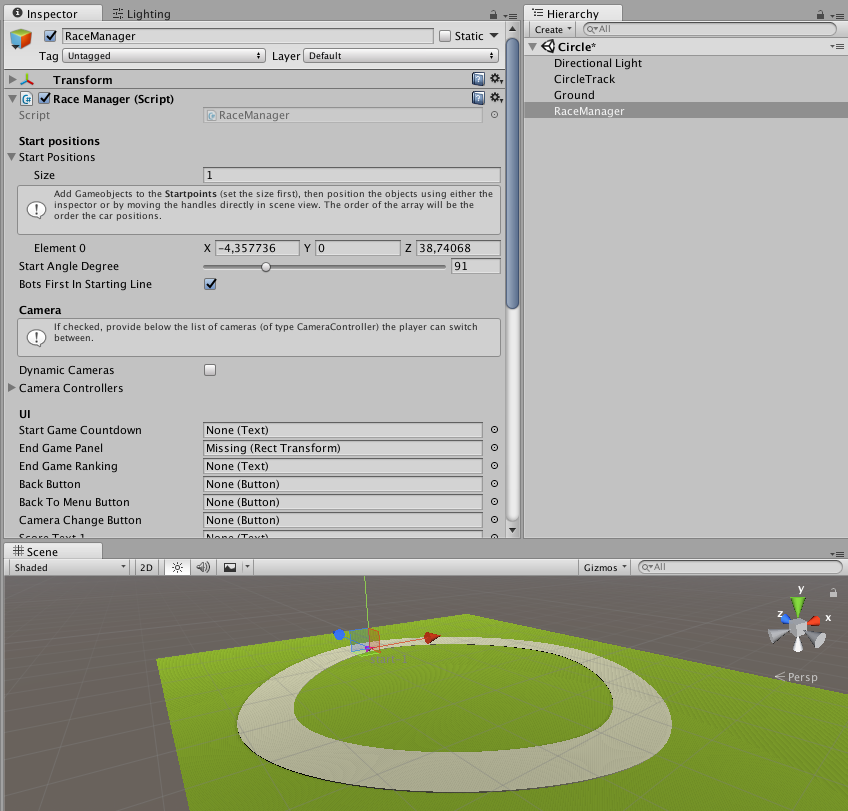
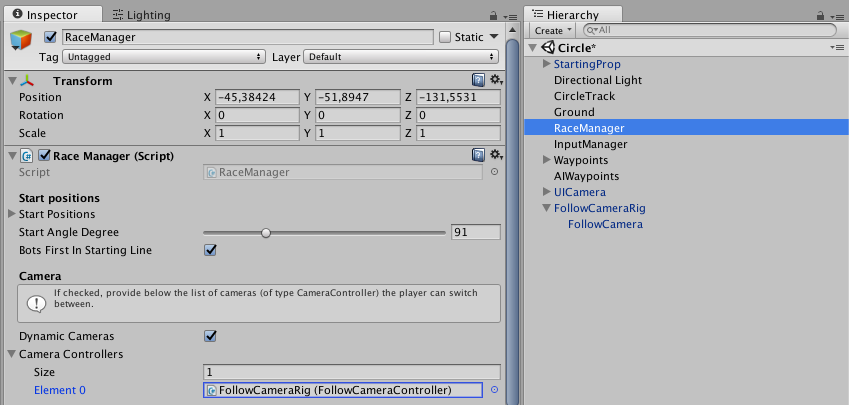
Now, we can add what’s required to test this track. Start with an empty gameobject to which you’ll add an InputManager component. This component doesn’t require any setup.
Then add a RaceManager component to that same object. Position a Start Position from its inspector anywhere on the track. You can also use the Scene view for that.
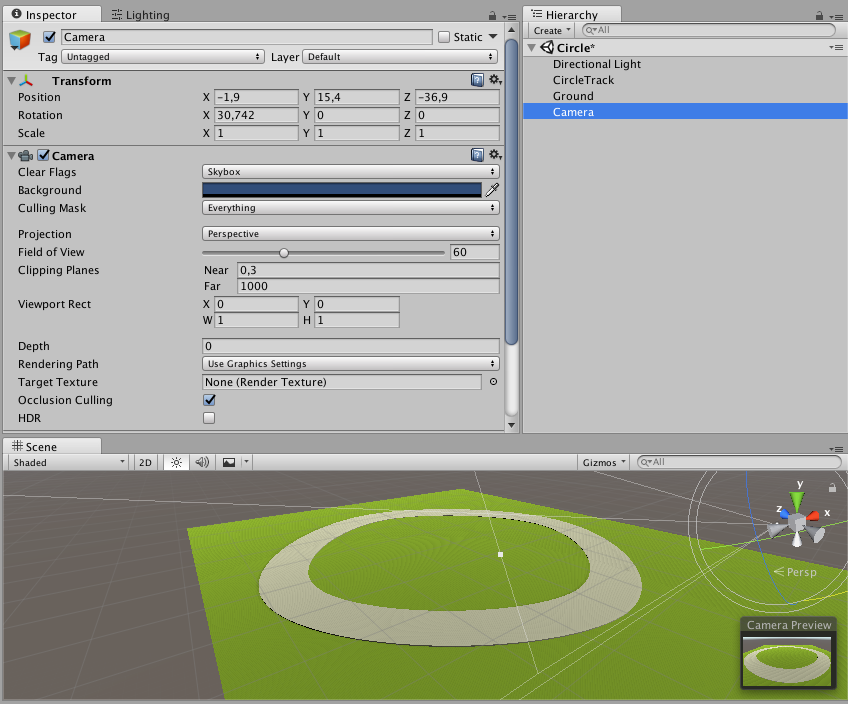
You can now test your track by choosing the Test Car Model “biker” (previously created). To do so, position the scene’s static camera so that the track is centered on screen.
And press play!
Complete track setup
Checkpoints
Create an empty gameobject and call it “Waypoints”, it’ll contain all our track’s checkpoints. Inside this object, you can nest a new empty gameobject. Call it “Checkpoint1”, and add a box collider (with trigger checked) to it, and add the Checkpoint tag to it. This object is a door that the player’s vehicle will have to go through to progress on a lap. Modify the object’s scale so that the door is approximately the size of the track’s width. It needs to be wide and high enough so that the vehicle can’t miss it.
Now all you have to do is duplicate this waypoint as many times as necessary, and the last one will be your finish line. Visually, you can also add the finish line prefab already included in the asset so that players know where the finish line is.
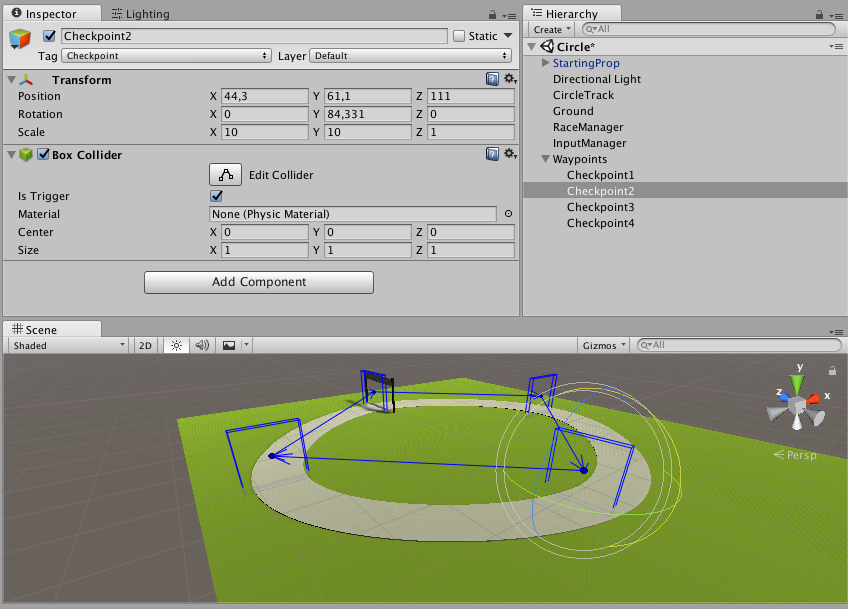
Once you’re done, add these checkpoints to the RaceManager’s Checkpoints array.
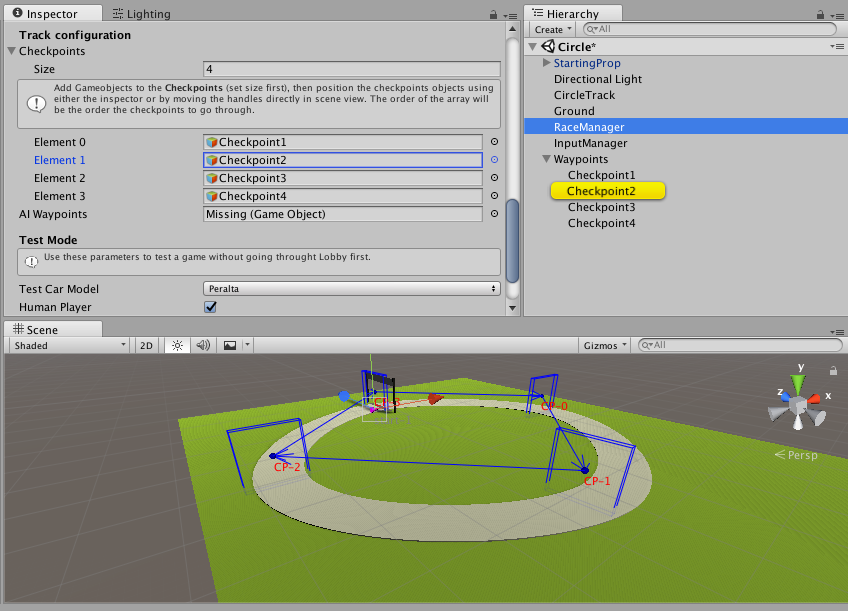
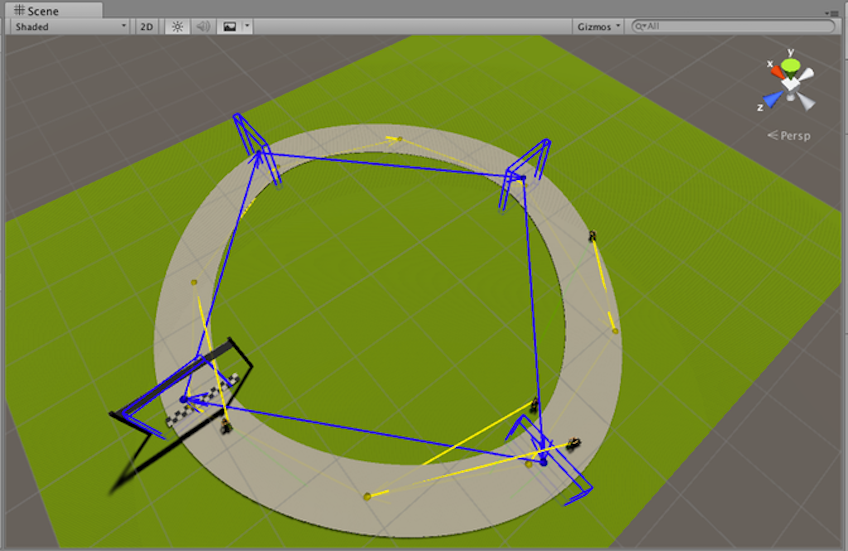
To make sure the checkpoints are correctly setup, you can have a look at the scene view with the RaceManager selected. It sorts and links the waypoints with a blue line and arrows.
You can now play your track and go through 3 laps (or less/more if you’ve set it up differently in the RaceManager). In Debug view you’ll be able to see that the score increases everytime a checkpoint is reached. If you haven’t activated debug mode yet, just uncomment this line of the CarController:
// Enable this line if you want to see debug info
			ShowDebugInformation();
Artificial Intelligence
We’ll allow our track to be navigated by bots. To do so, start by creating an empty gameobject, and name it “AIWaypoints”. Then, add a Waypoints component to it.
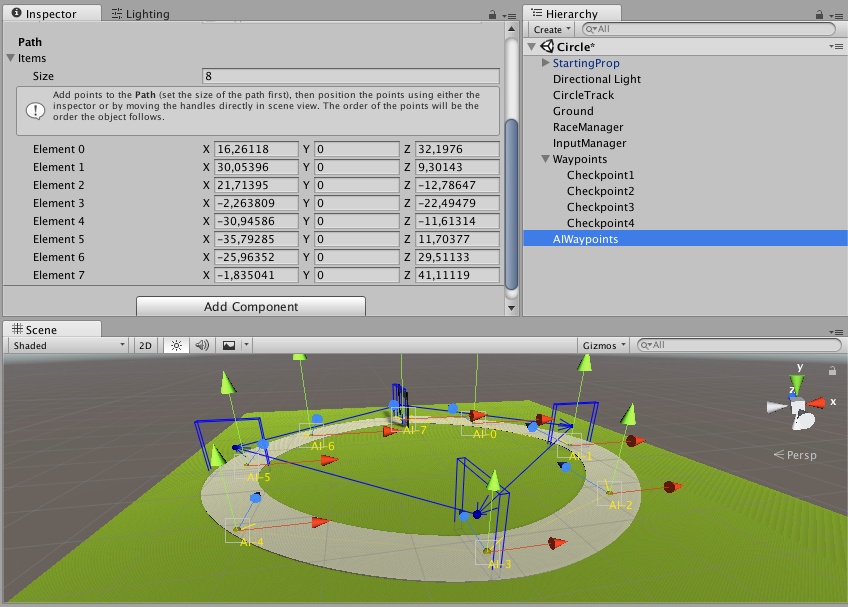
The engine allows you to move each waypoint directly from the scene view.
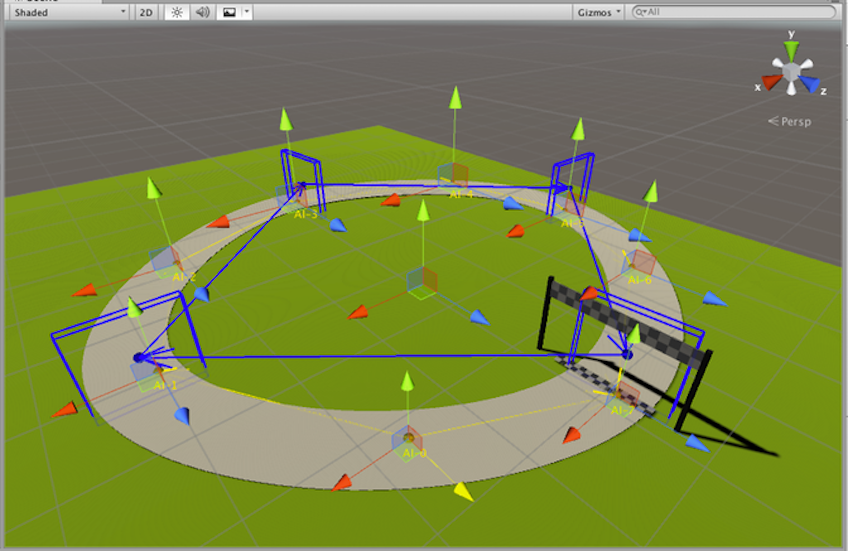
Finally, link the AIWaypoints gameobject to the RaceManager via its inspector. Add a bot in the RaceManager’s test mode and you’ll be able to see your bot moving around.
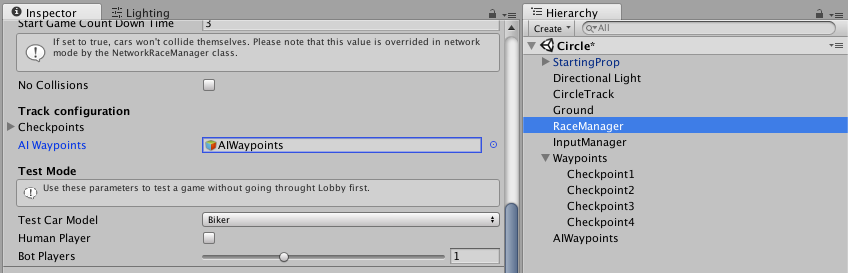
Don’t hesitate to play with the waypoints’ positions in real time, it’ll affect the AI’s behavior instantly. To improve the track even further, you can position the 4 vehicle start positions from the RaceManager and test the track with 3 bots and you as a player.
UI
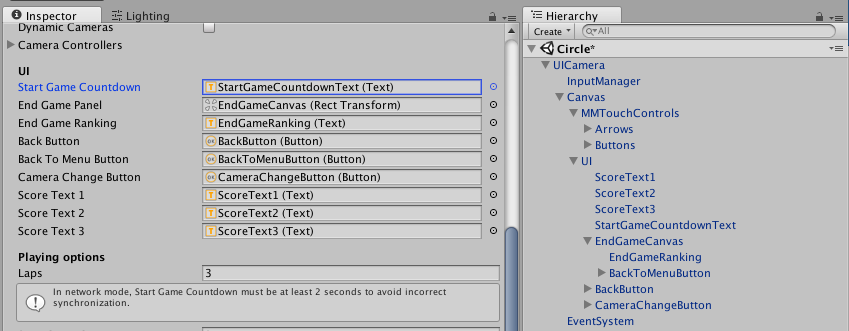
A readymade prefab for UI is included in the asset. Just drag the UICamera prefab into your scene. All you have to do then is link the subcomponents of this prefab to the RaceManager’s inspector.
You can now play your scene again. The interface and touch controls should be operational.
Cameras
Last step, we’ll replace the static camera with an isometric camera (a regular 3D camera is also available in the asset). Remove the main camera from the scene and drag and drop the FollowCameraRig prefab into it. Then, link this prefab into the RaceManager’s Camera Controllers from its inspector and check the “Dynamic Cameras” checkbox.
Test the game and you’re done!